Showing posts with label Upcycling with Paper. Show all posts

Friday, 9 December 2011

Tutorials for Christmas decorations using recycled paper.

Well, I have FINALLY got down to writing this post, despite having made the decorations a few nights ago and having the links kept on my desk top for over a week! Oh, well! Life is busy at the moment, what with school performances, costume making, class Christmas parties etc etc... It is all fun though.

I really enjoyed making these decorations because it meant sitting down, Christmas cooking on the TV and feeling festive. Also, the satisfaction of making some 'new' decorations for free! You must try and make some of these decorations, the tutorials I have found are very easy to follow. I have used an old Christmas food magazine but they could just as easily be made with pages from an old book or map.

This was the one I found the easiest and quickest:


I can't remember where I first saw these but Chris Job on the page Curbly explains very clearly, with beautifully clear photos, how to make them HERE. I used staples to attach the strips, as magazine pages are thinner.

These were slightly more challenging, but still easy enough once I got the hang of them...


To make these baubles, click HERE for the great and easy to follow tutorial by Ashley at the fabulous blog 'The Creative Place'. She has one of those blogs that you just get lost in as you click from post to post, tutorial to tutorial - wonderful!

This one was also very easy, I picked out reds, greens and golds from the magazine pages and used red thread in the sewing machine:


To make the garland, take a look HERE at this great tutorial, again from Ashley and her fabulous blog 'The Creative Place'.

OK, so this one is a little harder, but WELL worth it, I think! I used the front and back pages from the magazine, as these are a little thicker.


I also made a large version with the old road map I am slowly making good use of...which is "awesome!" according to my 9 year old.


To make these fabulously festive stars I followed this very clear tutorial by HPMcQ. She has the amazing ability to explain things in an extremely clear and concise way...you'll be safe following her tutorial! I love her photos too.

Lastly I made this decoration. This one took the longest to make. I love the texture:


I made this 'spiky bauble' by following THIS tutorial by Jessica Jones at 'How About Orange'. You really must take a moment to have a look around her page, she has some great ideas and tutorials.

Then of course there are the map star baubles I made recently, which could be easily made from magazine pages too.

So, there you are! I hope you enjoy making some of these to adorn your tree this year and can share with me in the satisfaction that you have spent nothing but created some beautiful decorations. Go on, get an old magazine out and put on some Christmas tunes...


Thursday, 24 November 2011

Map Bauble Stars

I made a discovery this week (excuse the awful pun!). I was on the look out (around the house) to see if I could find any materials to upcycle and came across this out of date map book:


A perfect example of an item which is disposable but can be made into something of more value. I sat down and cut, folded, sewed (is that a word?) and eventually came up with these:


Here is how they are made...


You will need 3 strips of map, about 1 and a half cm wide and as long as the map book (the one I used was an A3 one I think). The baubles are made from a larger circle and a small star. First you need to make the small star. To do this, take one strip and cut it in half, so you now have 2 short strips and 2 long strips. Put the long strips aside, making sure they don't get lost (awful pun number 2).


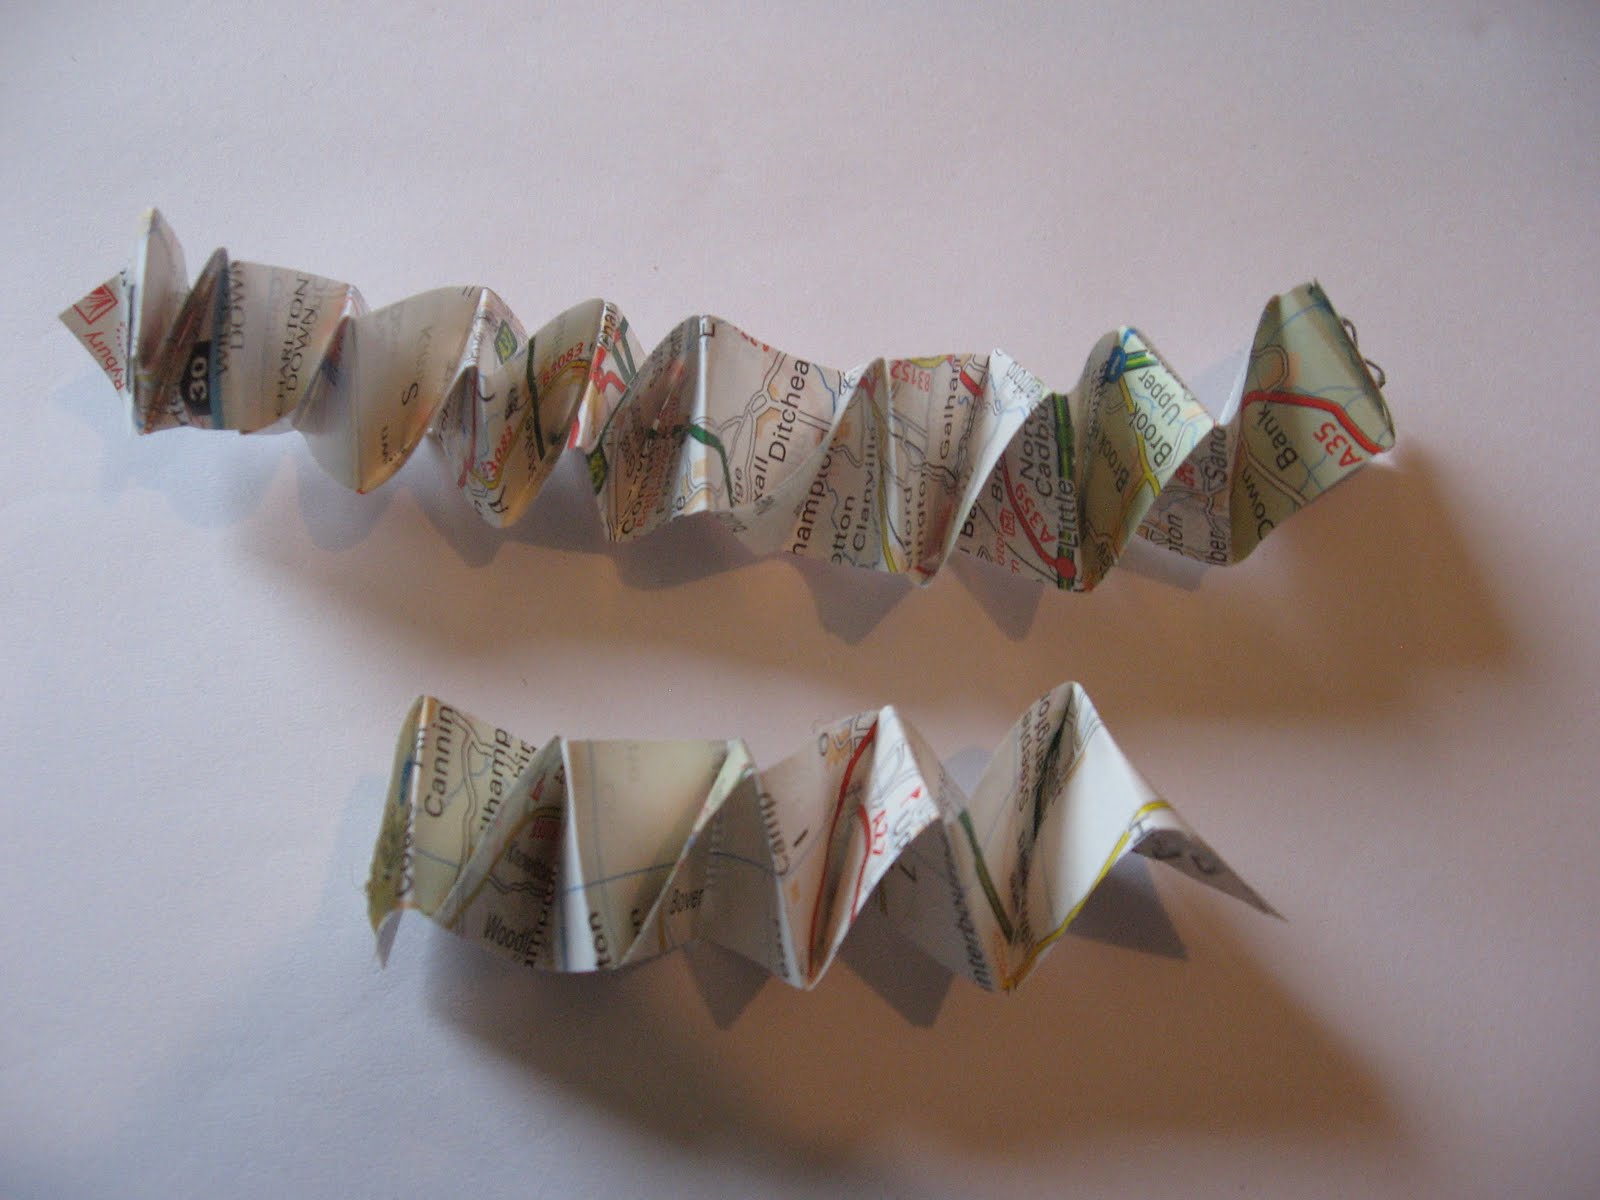
Put one strip on top of the other, at right angles to each other and staple. Now the folding starts. You want to fold the strips over and over, alternately, until you reach the end of the strips. Then staple the ends to secure.


Then repeat the process again with the 2 longer strips, so you have 2 map springs.


Just pull them slightly to make them expand, then pick up the smaller one. Attach the 2 ends to each other with a few stitches of thread. You will feel like you need another set of hands at this point, but keep going and you will get there (pun number 3 - sorry). Do not cut the thread yet because you will need to sew the larger strip together with it too.


OK, so now all that needs to be done is to arrange the longer strip so it circumnavigates (!) the star and sew the ends together to secure. Oh, and make sure you make a loop with the same thread so you can hang your creation up.


We will be having some of these hanging on our tree this Christmas but I am sure they could be made into a garland too to decorate other spaces. I like the way the light creates shadows on the folds. They might make a good present topper too - with map wrapping paper! Good for a person who likes hiking/travelling/driving. Maybe?

If you like the idea of upcycling maps, there are loads of ideas out there...beads, pots, flowers, frames, wallpaper etc etc!... Have fun!