Showing posts with label Gifts for children. Show all posts

Wednesday, 6 March 2013

Cat puppet made from an old jumper - Tutorial


I love hand puppets. My poor husband has had to pull me away from many a hand puppet as I have stood, at length, umming and ahhing in shops, wondering how they could be used. What story could they be used to tell? What game could be played with them? What voices could they have?...such is the mind of a primary teacher - once a teacher, always a teacher - always looking for fun ways to use things in the classroom. The other thing I love about hand puppets is that they are so easy to make! This tutorial is for a cat puppet, but can be easily adapted to create other animals too.

You will need:

An old jumper (doesn't matter if fulled or not)
Scissors
Sewing machine (or needle and thread for hand sewing)
Buttons for eyes and nose
Small piece of felt in contrasting colour to the jumper
Black thread
Needle
Paper to make the pattern

Ok, so first you'll need to make a pattern to cut your pieces from. I used a large mug and an egg-cup to draw around...


So, you can see that the mug outline is for the cat's head and the egg-cup outlines (x2) are the cat's arms. Just draw some straight lines to make the pattern look more puppet-like!

Your hand should be able to fit inside the lines. Here you see I have drawn around the pattern (about 1cm). This will be the seam allowance for when you turn it right side out later.


Remember to add ears too! If you want to make a bear instead, just draw curved ears. Now, cut the pattern out, around the edge of the seam allowance. Next, you want to cut out two pieces from your old jumper (just lay your paper pattern on top and cut around).


Now you need to fold over the two bottom ends of the two puppet pieces, by about 1 cm, and sew. Make sure the rough edge will be showing on the 'bad' side of the fabric (this will be inside the puppet) and not the 'good' side.


Now...tail time!

Start by cutting a rectangle from your old jumper, about the same height as the two puppet pieces you've already cut and about as wide as the base of the puppet pieces.


Fold this in half, lengthways and sew around three edges, leaving a small edge open. Fold right side out and you have a tail!


Now you need to attach the tail to one of the puppet pieces - remember to sew it onto one of the rough edges, so it will be on the inside of the puppet.


Nearly there! What would be a great idea to do now would be to sew on the buttons and do the embroidery for the face BEFORE sewing the two pieces together - I sewed the face details on at the end and found it tricky!

Place the two pieces together, with the good sides of the fabric facing IN and sew together, leaving about 1cm seam allowance. Remember to leave the base UNSEWN so you can put your hand inside the puppet!


Now turn the right side out and use a pencil to push the ears out and make them more pointy. Give your puppet a try on to see if you need to make any adjustments. I had to because my original pattern was too wide. I simply turned the puppet inside-out again and sewed the head narrower on both sides...


Next I cut two pieces of felt into triangles and sewed them onto the ears...


Added the face...


...finished! One upcycled cat puppet, ready to be wrapped up and given as a present (well, this one was anyway!).


"Meow!"

I hope you have fun making and playing with your puppet :)

You might also like my tutorial for making a teddy bear sleeping bag.

Wednesday, 6 June 2012

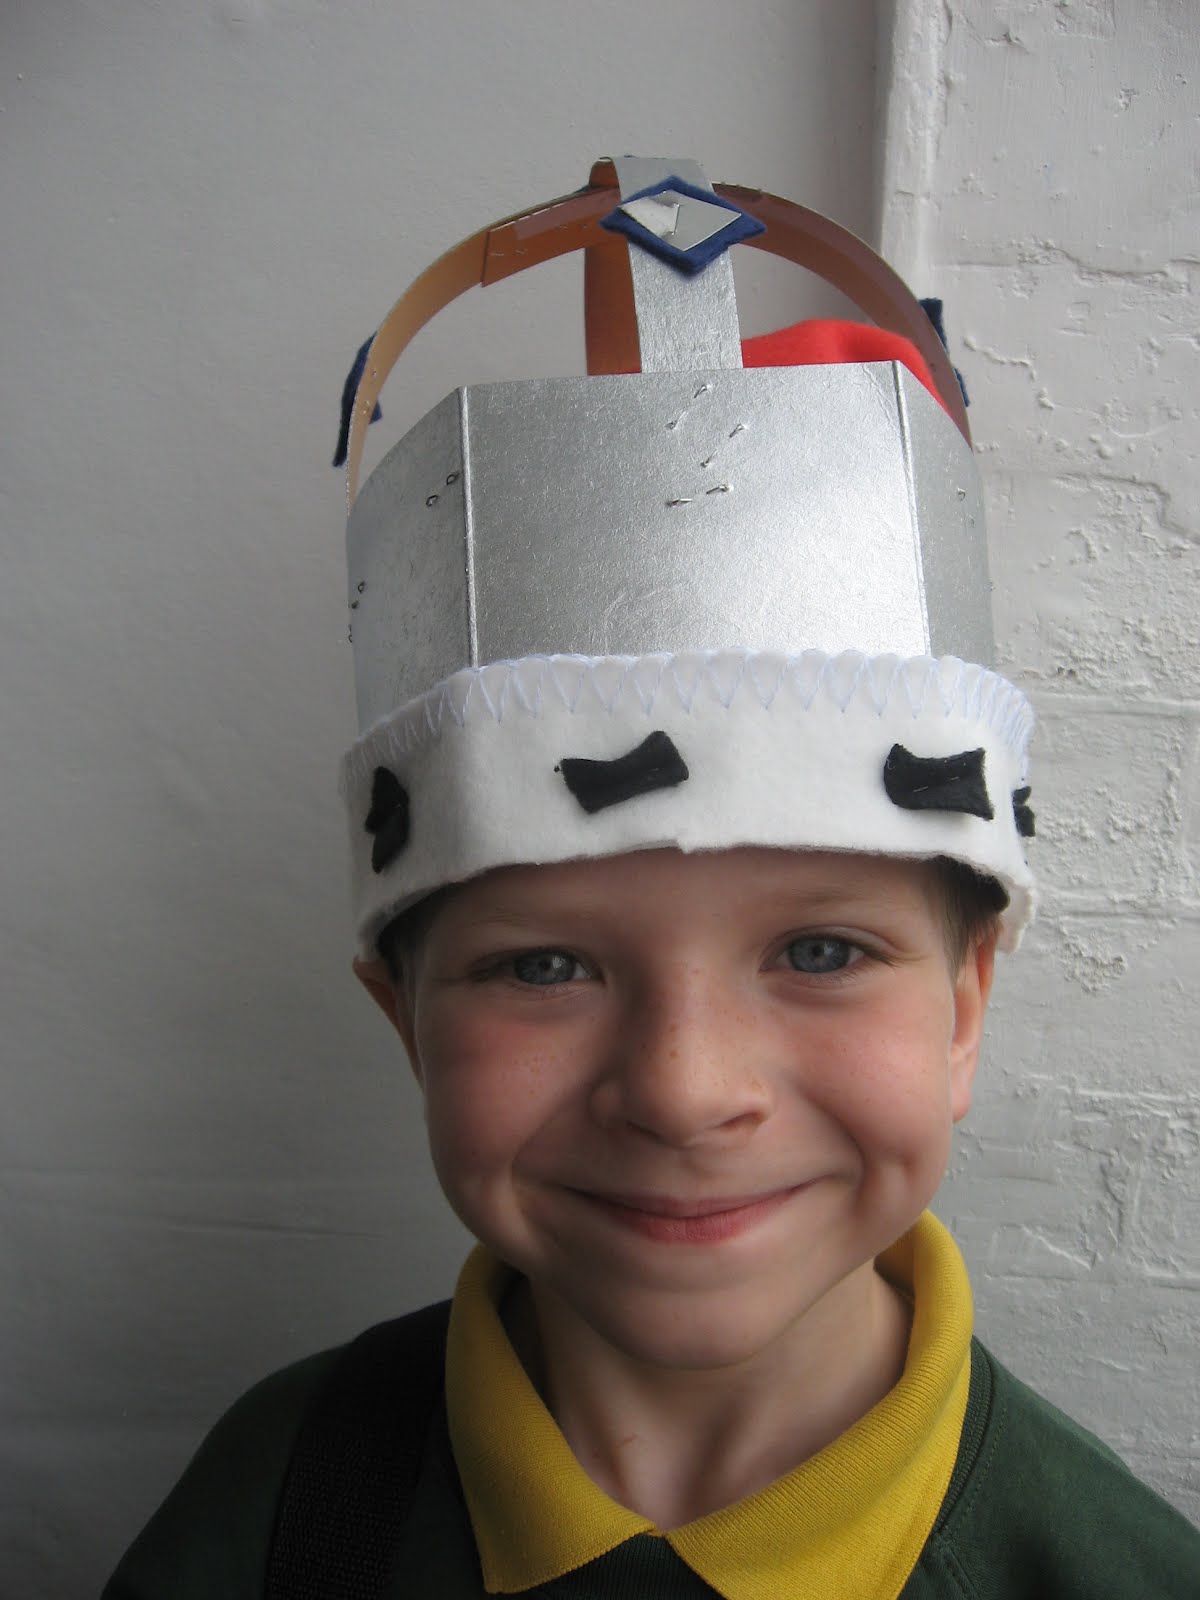
Diamond Jubilee Crowns


We have enjoyed watching some of the celebrations of the Queen's Diamond Jubilee on the tv over the long weekend. My boys are on holiday from school this week, but last week did lots of activities at school in the run-up to the big event.

* learning the National Anthem in class

* All week the school lunch menu was 'Jubilee' themed (British and Commonwealth meals)

* An afternoon tea party with scones and tea (fruit juice!)

* Making crowns at home to wear to the tea party...that's what I'll be sharing with you today.

They were so excited to make their crowns, bless them, but I have to admit that I did leave them to rather the last minute because I have been so tired just recently with pregnancy number 4 (22 weeks now - very exciting!).

I would have loved for them to have more of a part in the making process but they were still just as happy to tell me their designs and for me to make them while they slept. Plus...it was a lovely surprise for them to come down the next morning and find them!


When I set about making them, I did the usual thing of searching in the recycling box for materials ...only to find we had just one cereal box...eek! Well, that just added to the challenge - make three crowns in one evening, from one cereal box! Here's how I did it...

First I opened up the cereal box so it was flat then cut it into 3 equal strips (so I then had 3 long strips).

Then, while the boys were eating their dinner, I held a strip around each of their heads and stapled in place to create a snug fit (ha ha, that sounds like I stapled to their heads!! Be assured that I didn't). I tried to remember to have the flat side of the staple on the inside of the crowns to make sure the sharp side didn't scratch on their heads.

I then had three circlular bands of card, ready to become crowns.


This was the easiest and quickest to make. He wanted points and curves alternating all the way around. I started by doing points all the way around and then cutting every other point into a curve (or semi circle).

Daddy then took the crown to the end of the garden and sprayed it silver...I know, not the most environmentally friendly choice, but we had it in the house and, as always when making things, I try to use things we already have to hand and not buy anything extra if we don't need to.

Oh, I should also add that I made sure all 3 crowns had the coloured side of the cereal box on the inside and the plain side on the outside so that the paint would stick easier.


The other 2 crowns were made by keeping the original strip of card as it was and adding 2 thinner, long strips of cereal box card (which I salvaged from the flap off-cuts and stapled together). I just laid each strip over the crown to make it curve and then stapled each end to the crown base band and then stapled where they overlapped in the middle, to keep in place. These then got sprayed silver by Daddy too.


By the time all excitement of the silver spraying was done and the crowns were dry, it was off to bed for my three little Kings. The making fairy (aka a very tired Mummy) got to work at the finishing details.

I had been given some remnants of red, white and blue fleece blankets a while ago that someone had already used for a project, so these became the perfect choice to embelish the crowns. Also, as you may already know, I LOVE using fleece or felt to work with because it doesn't fray!

WHITE - I cut strips and used this as the fur edging, using little black rectangles of fleece too. This was stapled on.

RED - Quite tricky, but I cut larger sqaures of fleece and stapled them to the inside of the crowns.

BLUE - Small squares of fleece with some squares of silver card on the top, stapled on.

That's pretty much it!

1 cereal box + 3 enthusiastic and excited boys + 1 tired Mummy maker = 3 crowns to wear while munching on a Jubilee tea party!


What I used:

* 1 cereal box

* Silver spray paint

* Stapler and staples (LOTS!)

* Scissors

* Red, white, blue and black fleece

* Silver card (tin foil would have worked just as well)

How about making a crown from that cereal box you're about to recycle? After all, who says the Jubilee celebrations have to end already?!

Wednesday, 21 December 2011

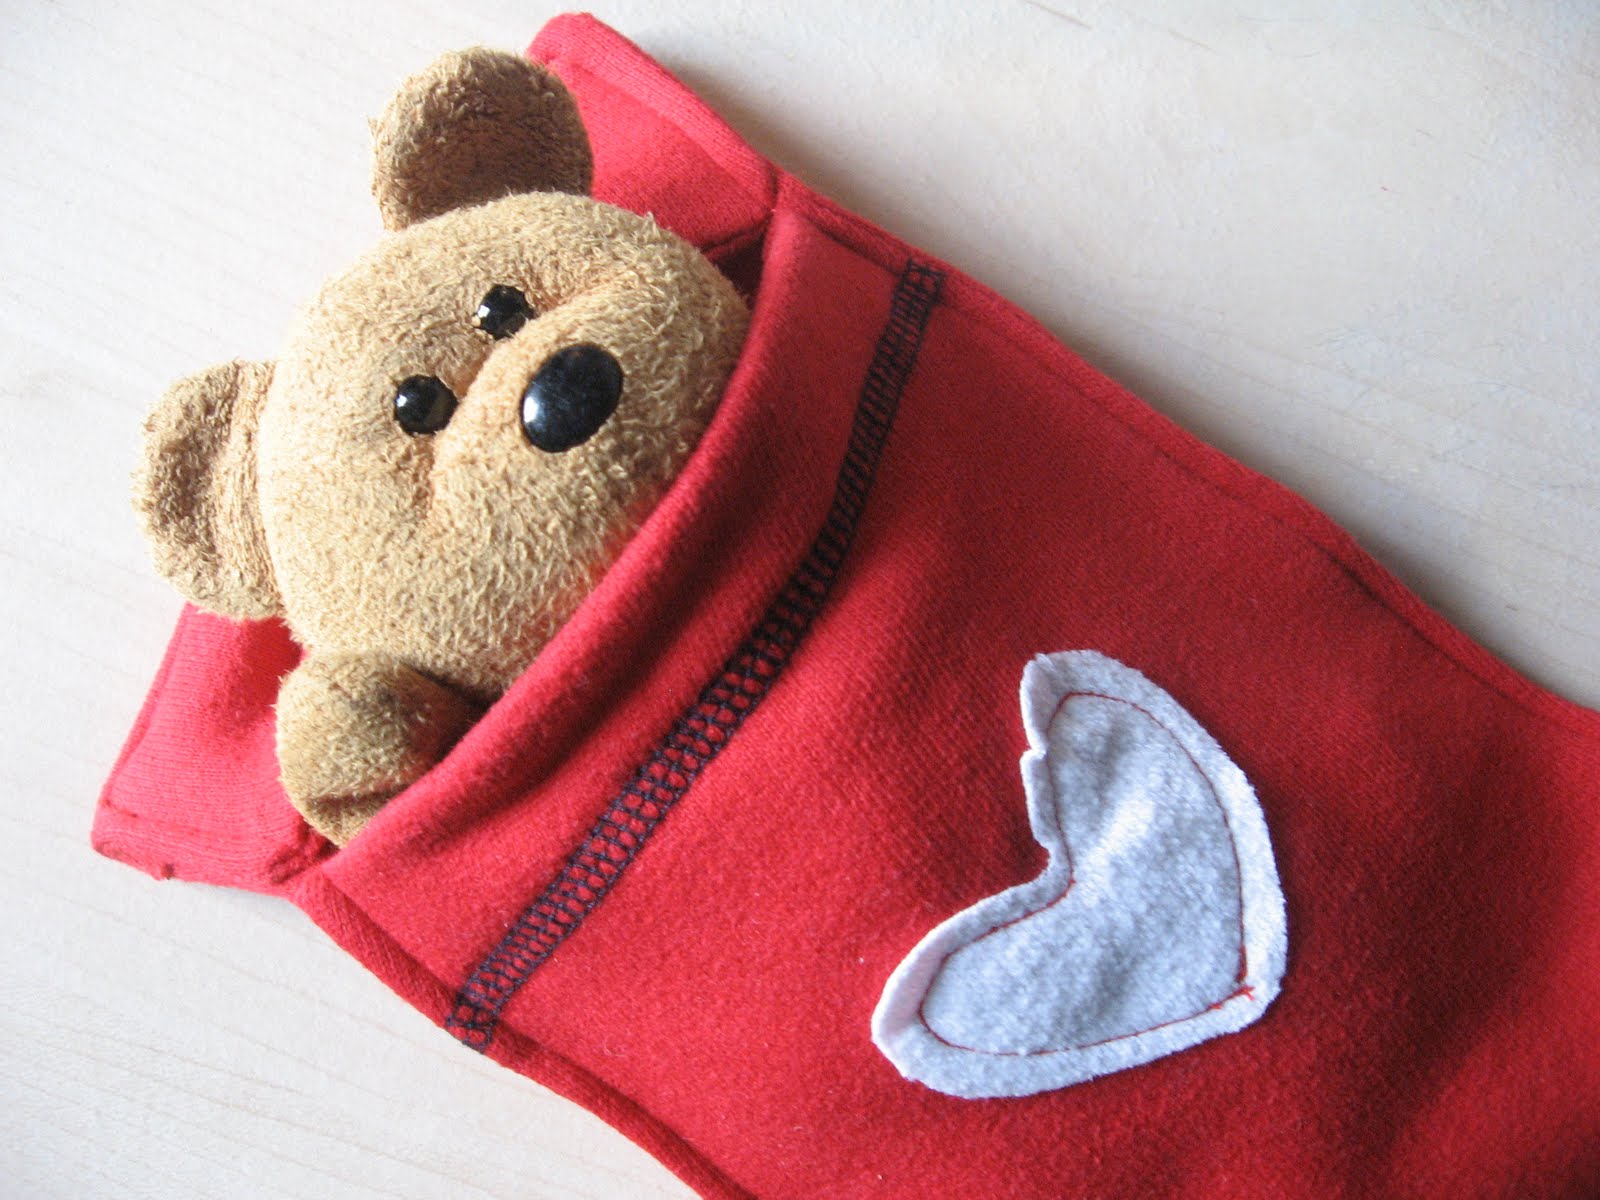
Upcycled Teddy Sleeping Bag Tutorial


If you have had a sort out of your wardrobe recently you probably found some old, out of shape, not good for wearing clothes. Hopefully you found something made from jersey fleece fabric (jersey like a t-shirt, with soft fleece on the other side). That is what I used and it fitted the job perfectly. I used an out of shape bright red jumper. The beauty of using a jersey/fleece type fabric is that it doesn't fray, is easy to cut to shape and is thicker than standard t-shirt material. Well...we don't want teddy to be cold do we?!

So, now you've got your jumper, this is what else you'll need:

- Fabric scissors
- Small scrap of t-shirt (jersey fabric), about 7cm by 7cm
- Thread
- Sewing machine! (or needle if doing this by hand)
- Pins
- Paper and ruler/tape measure for making templates
- Teddy!

Let's start!

Start by measuring, onto a piece of paper, a rectangle approximately 27cm long by 15cm wide and set aside. Next measure, onto another piece of paper, a rectangle 15cm wide and 33cm long (6cm longer than the shorter rectangle). Lay your paper rectangles on top of the jumper, pin on to secure, then cut out.


The shorter rectangle will end up being the top cover of your teddy sleeping bag. I used the dark blue edging on the jumper to be the open edge of the sleeping bag...it looks nice AND I didn't have to hem it!

You can see in the photo above that the smaller rectangle has a bit cut off from the bottom. This smallest rectangle measures about 6cm by 15cm and will be used to give extra padding to the teddy's cushion.

I hope you are following ok. I apologise now because my measurements are not precise! I tend to do things a lot by eye, rather than measuring...sorry!

Next...


Get your scrap of t-shirt fabric (you can now see what I mean about not being precise in my measurements!), this will be easier if you start with a square! About 7cm by 7cm (but depends on how big you want your decoration to be...not too close to the edge though or it will get caught in the edges when you sew them together).

If you want to make a heart, fold your fabric scrap in half...


Cut out half a heart shape...


Open out and trim to the shape you want...


Now, you want to pin this to the middle top edge of the top cover of the sleeping bag (on the right side - I mean the side of the fabric that will be seen).


Sew on!


I used the sewing machine but this could just as easily be done with needle and thread. Maybe you could add an initial inside the heart to make it more personal?

Right, now grab your largest rectangle. Place the smallest of your 3 rectangles onto the top edge of the largest rectangle (with right sides of the fabric together on the inside- in my case, that meant putting the soft fleecy sides on the outside).


Now you need to sew the 2 side edges and the top edge closed...


Trim off the corners, being careful not to snip the thread. This will help to make the corners more pointy when you turn it right side out.


After you've done that, flip the pillow you have just created so that the right sides are out, push the corners to points with your finger or a pencil and get ready to do the same again with the teddy's blanket part of the sleeping bag...


Right sides together...


Sew the bottom and side edges closed and snip corners...


Turn right side out and make corners pointy...


Now all you have to do is fold the pillow down...


Then sew all around the outside edges of the sleeping bag, which secures the pillow in place and makes the whole project look more professional, I think!

I decided not to sew down the bottom edge of the pillow because it looks like a nice secret pocket to store things in...maybe a lost tooth, ready for the tooth fairy or a precious coin? I thought that sounded fun!


All ready for teddy!

My finished sleeping bags measure 25cm long and 13cm wide and fits a bean bag teddy perfectly. You may have to make your sleeping bag bigger or smaller, depending on the size of your teddy. Although, in my experience, teddies aren't that fussy and don't mind being squashed a bit!

I hope you have fun making and re-using! Post a photo on my facebook page if you do one, I'd love to see :)