If you have had a sort out of your wardrobe recently you probably found some old, out of shape, not good for wearing clothes. Hopefully you found something made from jersey fleece fabric (jersey like a t-shirt, with soft fleece on the other side). That is what I used and it fitted the job perfectly. I used an out of shape bright red jumper. The beauty of using a jersey/fleece type fabric is that it doesn't fray, is easy to cut to shape and is thicker than standard t-shirt material. Well...we don't want teddy to be cold do we?!
So, now you've got your jumper, this is what else you'll need:
- Fabric scissors
- Small scrap of t-shirt (jersey fabric), about 7cm by 7cm
- Thread
- Sewing machine! (or needle if doing this by hand)
- Pins
- Paper and ruler/tape measure for making templates
- Teddy!
Let's start!
Start by measuring, onto a piece of paper, a rectangle approximately 27cm long by 15cm wide and set aside. Next measure, onto another piece of paper, a rectangle 15cm wide and 33cm long (6cm longer than the shorter rectangle). Lay your paper rectangles on top of the jumper, pin on to secure, then cut out.

The shorter rectangle will end up being the top cover of your teddy sleeping bag. I used the dark blue edging on the jumper to be the open edge of the sleeping bag...it looks nice AND I didn't have to hem it!
You can see in the photo above that the smaller rectangle has a bit cut off from the bottom. This smallest rectangle measures about 6cm by 15cm and will be used to give extra padding to the teddy's cushion.
I hope you are following ok. I apologise now because my measurements are not precise! I tend to do things a lot by eye, rather than measuring...sorry!
Next...
Get your scrap of t-shirt fabric (you can now see what I mean about not being precise in my measurements!), this will be easier if you start with a square! About 7cm by 7cm (but depends on how big you want your decoration to be...not too close to the edge though or it will get caught in the edges when you sew them together).
If you want to make a heart, fold your fabric scrap in half...
Cut out half a heart shape...
Open out and trim to the shape you want...

Now, you want to pin this to the middle top edge of the top cover of the sleeping bag (on the right side - I mean the side of the fabric that will be seen).
Sew on!
I used the sewing machine but this could just as easily be done with needle and thread. Maybe you could add an initial inside the heart to make it more personal?
Right, now grab your largest rectangle. Place the smallest of your 3 rectangles onto the top edge of the largest rectangle (with right sides of the fabric together on the inside- in my case, that meant putting the soft fleecy sides on the outside).
Now you need to sew the 2 side edges and the top edge closed...
Trim off the corners, being careful not to snip the thread. This will help to make the corners more pointy when you turn it right side out.
After you've done that, flip the pillow you have just created so that the right sides are out, push the corners to points with your finger or a pencil and get ready to do the same again with the teddy's blanket part of the sleeping bag...
Right sides together...
Sew the bottom and side edges closed and snip corners...
Turn right side out and make corners pointy...
Now all you have to do is fold the pillow down...
Then sew all around the outside edges of the sleeping bag, which secures the pillow in place and makes the whole project look more professional, I think!
I decided not to sew down the bottom edge of the pillow because it looks like a nice secret pocket to store things in...maybe a lost tooth, ready for the tooth fairy or a precious coin? I thought that sounded fun!

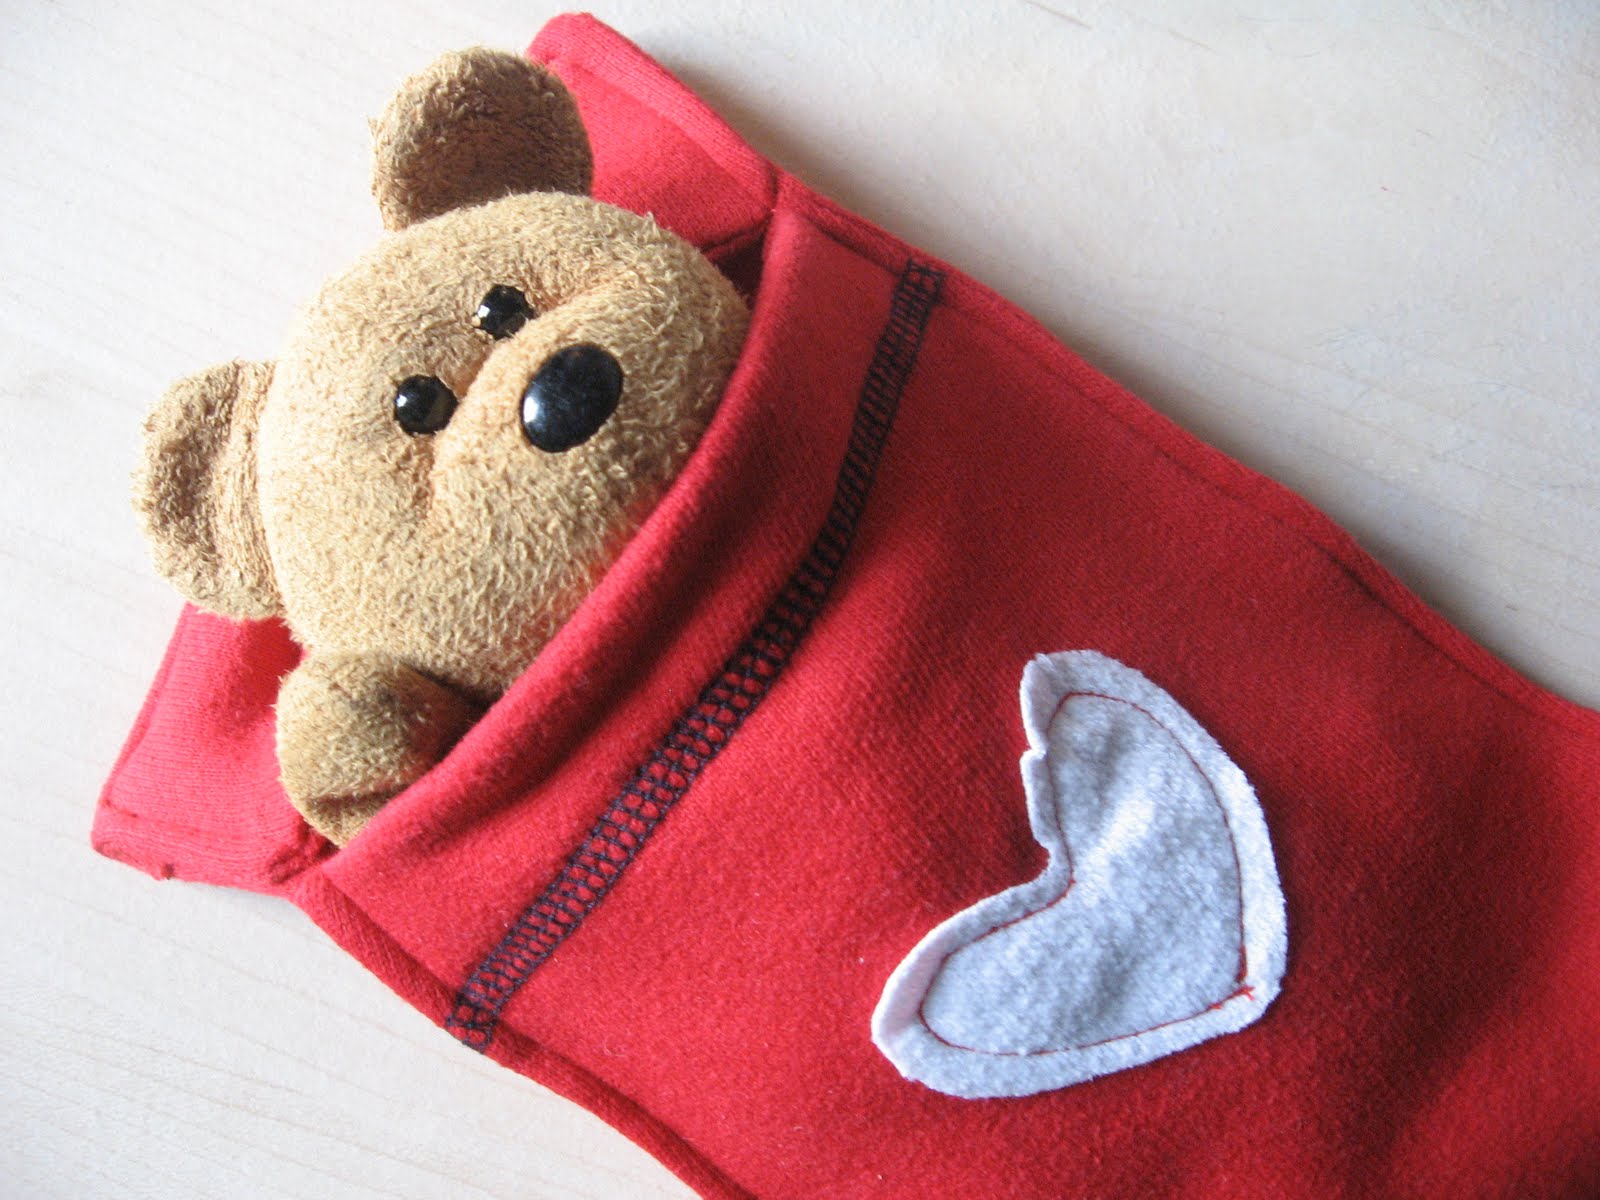
All ready for teddy!
My finished sleeping bags measure 25cm long and 13cm wide and fits a bean bag teddy perfectly. You may have to make your sleeping bag bigger or smaller, depending on the size of your teddy. Although, in my experience, teddies aren't that fussy and don't mind being squashed a bit!
I hope you have fun making and re-using! Post a photo on my facebook page if you do one, I'd love to see :)
That is so very cute! The secret pocket is the best. If I had more time before Christmas...
ReplyDeleteMaybe next year;)
Thank you Ma! :)
ReplyDeleteSOooooo cute! That would make such a lovely little present for someone's special toy! To-do list for next year ;-)
ReplyDeleteThank you Anna :) I know one little boy here who is desperately wanting one to turn up in his stocking on Christmas morning!
ReplyDeleteThat is very clever!
ReplyDeleteThank you Carla :)
ReplyDeleteWhat a cute, clever idea, Naomi! I've pinned this one. Thanks for the stopping by my blog.... your newest follower.
ReplyDeleteHi Naomi, I'll begin a new link party every Sunday. The next one will be Dresses for Girls.
ReplyDeleteThank you Pam! You are very welcome. I am now following you on facebook and look forward to joining in with your future link parties.
ReplyDeleteCool idea! loving you blog!
ReplyDeleteThank you very much Keynko :)
ReplyDelete